Adding Sounds

In this activity, you'll add sounds to your interactive project.

Just as with images, you have several options for adding sound to your project. You can use sounds built into Snap!, you can record your own sounds, you can import a sound file from your computer, or you can use Snap! to create music like you did in Lab 1: Song Player.

Revisiting Your Plan and Setting Up

  1. Talk with Your Partner Review your project plan. What kind of sounds make sense for your project? When should the sounds play?
  2. Set Up Your Headphones or Speakers
  3. Drag a set volume to () % block onto the stage in case you need to adjust the volume.

There are two kinds of sounds in Snap!: sound recordings (stored in the "Sounds" tab) and songs made by playing notes as the computer runs your program.

In Lab 1, you made songs by playing notes, and to hear them, you clicked a custom block made for this course, such as play ♪ pitch: () beats: () or play song ().

To play sound recordings, you'll use either of these blocks from the "Sound" menu: play sound () or play sound () until done.

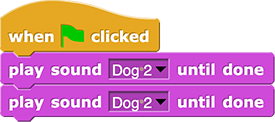
You'll notice the difference between these two new blocks if you snap two or more of them together. The play sound block starts playing the sound while the computer keeps going through the blocks in your code. So, multiple sounds may play at the same time. The play sound until done block doesn't let the computer move on to the next block in the script until the current song finishes playing.

Adding Sounds

  1. Explore the instructions below and choose at least one method of adding sound to your project.
    You add a Snap! built-in sound almost the same way you add a sprite costume or a stage background.

    1. Choose "Sounds..." from the File (File menu button) menu.
    2. Play different sounds until you find one you want.
    3. Select the sound you want by clicking anywhere on its button except where the "Play" button is.
    4. Click "Import."
    5. Add more sounds if you want.
    6. Click "Cancel" to close the dialog box.

    1. Click the "Sounds..." tab above the scripting area.
      image of the 'Sounds' tab, which is located between the 'Scripts' and 'Costumes' tabs above the scripting area
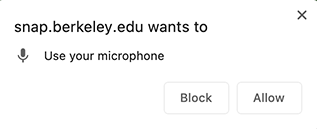
    2. The browser may ask you for permission to access the microphone. Click "Allow."
      screenshot of browser message requesting microphone access for snap.berkeley.edu. Click 'Allow.'
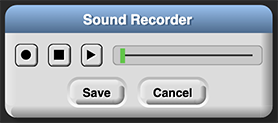
      Click the record button (record button) to open the "Sound Recorder."
    3. In the "Sound Recorder," click the record button (the circle) to record your sound, and press stop (the square) when you are done.
      picture of the Sound Recorder window, which has a five buttons: a circle for record, a square for stop, a right-pointing triangle for play, 'Save,' and 'Cancel'
    4. Click the play button (the triangle) to listen to your recording, and if you like, record again to replace it until you are happy with the recording.
    5. Click "Save" to save your recording. It will appear in your list of sounds.
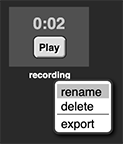
    6. Rename your sound so it's easy to find later. Right-click the sound, select "rename," give it a name that will remind you what it is, and click "OK."
      picture of a sound icon in the 'Sounds' menu with the dropdown menu open showing the 'rename' option selected

    1. To use a sound file that you have on your computer, drag the sound file anywhere into the Snap! window.

    If you want to use an sound that someone else created, check to make sure that you are allowed to use it. If you are, leave a comment in your Snap! code acknowledging the creator. You learned about adding comments in Unit 1 Lab 6 Activity 1: Texting Time.

    1. Open the project with the song you want to import.
    2. Right-click the script that plays the song. (See note below about songs that use variables.)
    3. Click "export" to download that code.
    4. Open your interactive project.
    5. Import the file that downloaded.
    6. This will not work for notes stored in a variable because variables aren't exported. So, play song (list (60, 60, 67, 67, 69, 69, 67, 0) will work, but play song (Twinkle Twinkle Little Star) will not work. If you have notes stored in a variable, move your list of notes directly into the play song block before you export.

      If your song is a script with multiple blocks, it will make your code neater to export/import if you create a new command block to store your song and you export that. Click for an example.
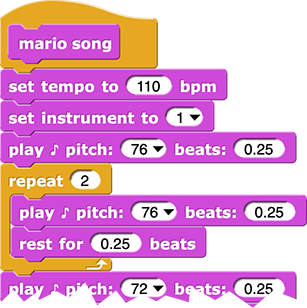
      	'mario song' hat block from Block Editor showing first part of song code attached below

  2. Try out your sounds(s) and adjust them until they sound the way you want them to.
  3. Add hat blocks to tell your sound(s) when to play. If you have more than one sound, use a hat block to tell the computer when to play each one. For example:
    when I am (clicked) {
	play sound (Dog 2) until done
	play sound (Dog 2) until done
} when I am (clicked) {
	play sound (Meow)
}
  4. Now Is a Good Time to Save
In this activity, you learned different ways of adding sounds to a Snap! project and chose one or more ways of adding sound to your interactive project.