LED It Glow

In this activity, you'll learn about LED lights and how to turn them on both with and without code.

Collect Materials

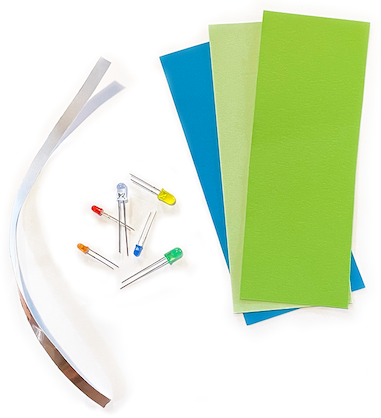
Paper Circuit materials: LED lights, paper, and copper tape
  1. Gather Materials
    • micro:bit and USB cable
    • Copper tape
    • LEDs
    • Coin cell battery
    • Pencil
    • Needle nose pliers (optional)
    • Craft supplies
    • For a list of craft supplies you may find helpful, see Lab 2 Activity 2: Building Your Pet.

LEDs and Circuits

In this activity, we'll explore programmable light by using LEDs.

An LED contains a light emitter inside of a plastic bulb. This light emitter can be made from different materials, and when electricity runs through it, it shines different colors. However, electricity can only flow in one direction, and the name for electronic parts with this quality is called a diode. Thus, an LED stands for "light-emitting diode."

An LED only works when oriented in one direction (it's not reversible), so it's important to be familiar with its structure. LEDs have two legs with different lengths. The long leg is the positive side of the LED, and the short leg is the negative side.
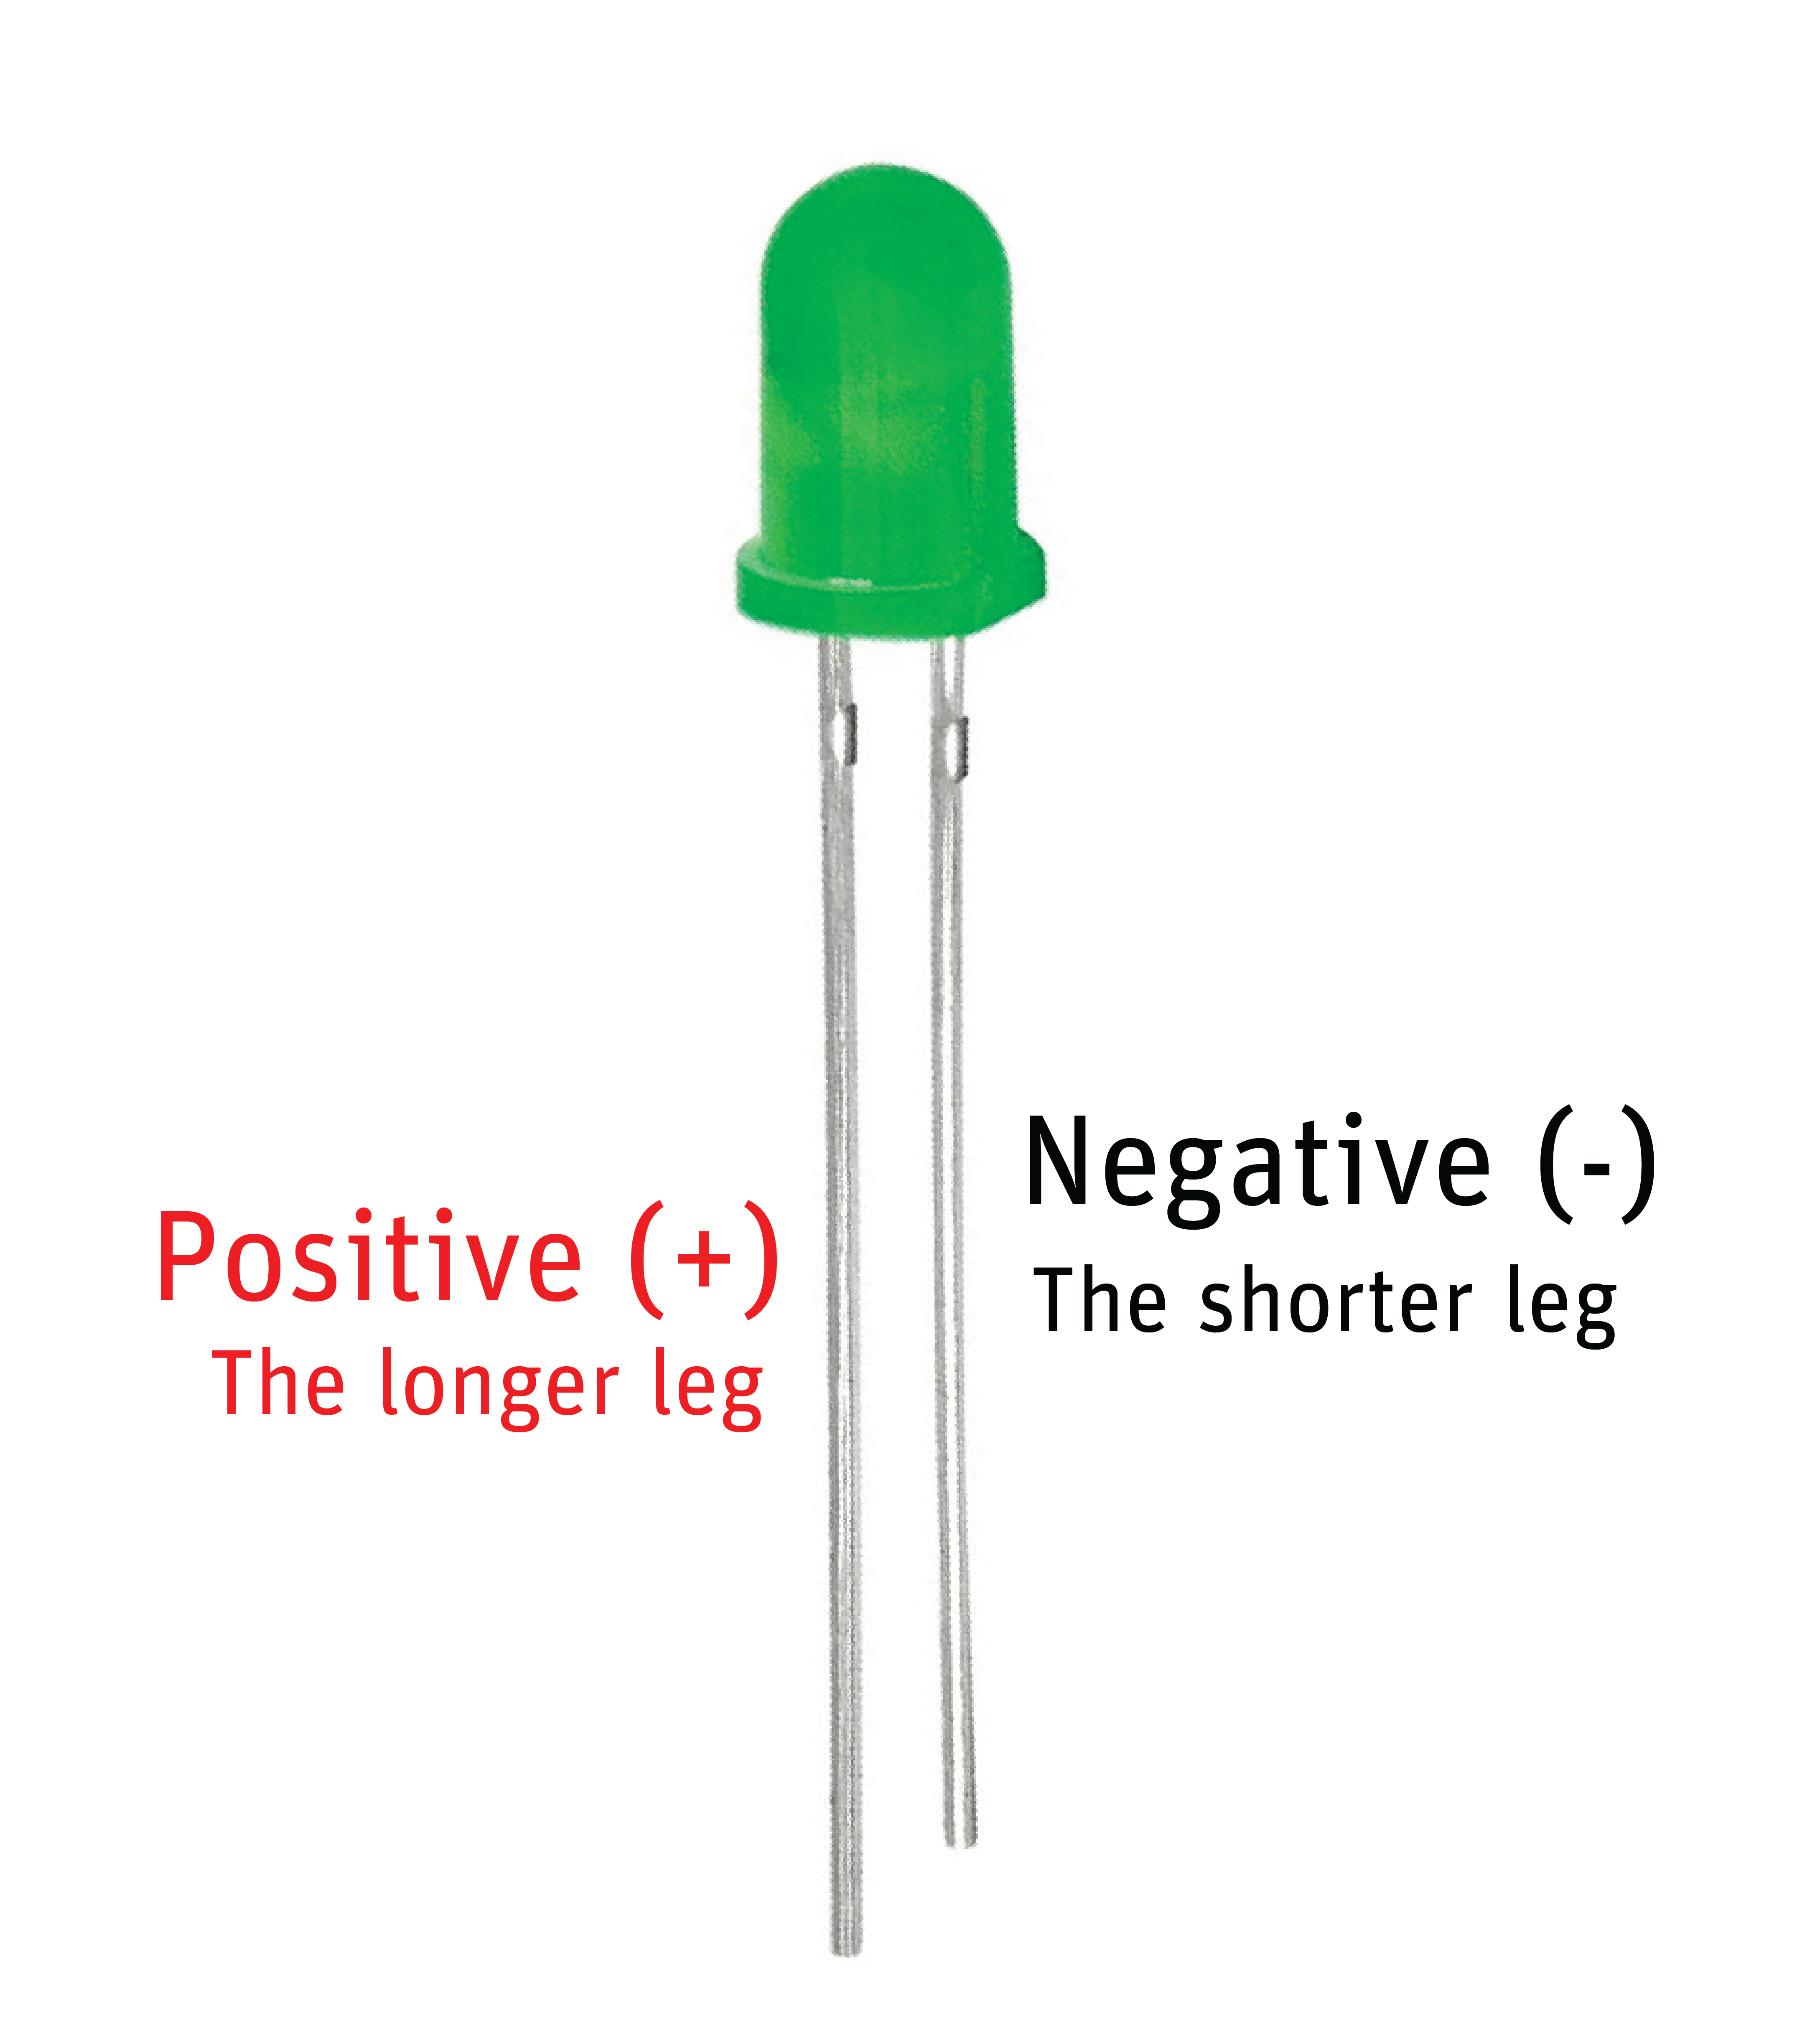
LED labeled with positive and negative leg

First, we will illuminate an LED with only a battery (no code). The simplest way is to place the positive (+) side of your LED on the positive side of the battery.

  1. Grab an LED and a coin cell battery. Place the long leg on the positive (+) side of the battery, and the short leg on the negative side (-) of the battery ].

Next, we'll walk through how to make a circuit on a piece of paper.
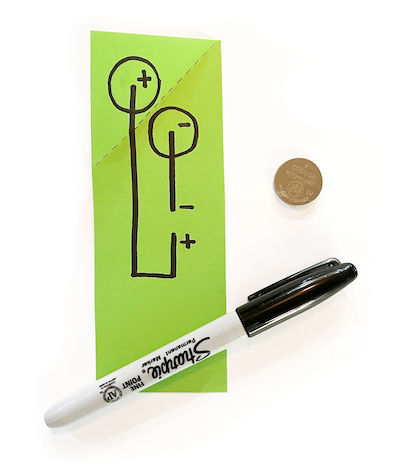
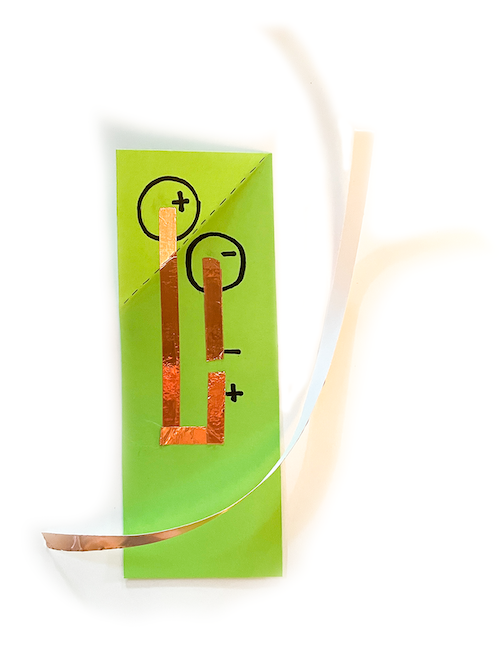
  1. Recreate this drawing on a quarter sheet of paper. The circles are created by tracing a coin cell battery twice in the corner of the piece of paper. The dashed line is where the paper folds. Take note of where the positive (+) and negative (-) signs are located.
  2. a paper with diagram to reproduce, including directional (+) and (-) signs
  3. Use copper tape to cover the drawn path, leaving a gap in the middle. Careful to use one continuous piece of tape, if possible, as the underside of the tape is less conductive and may lead to the light not turning on.
  4. copper tape on top of the circuit diagram lines
Tip: Use this folding technique to make corners with copper tape. Click for a video.
fold the tape backwards then forwards
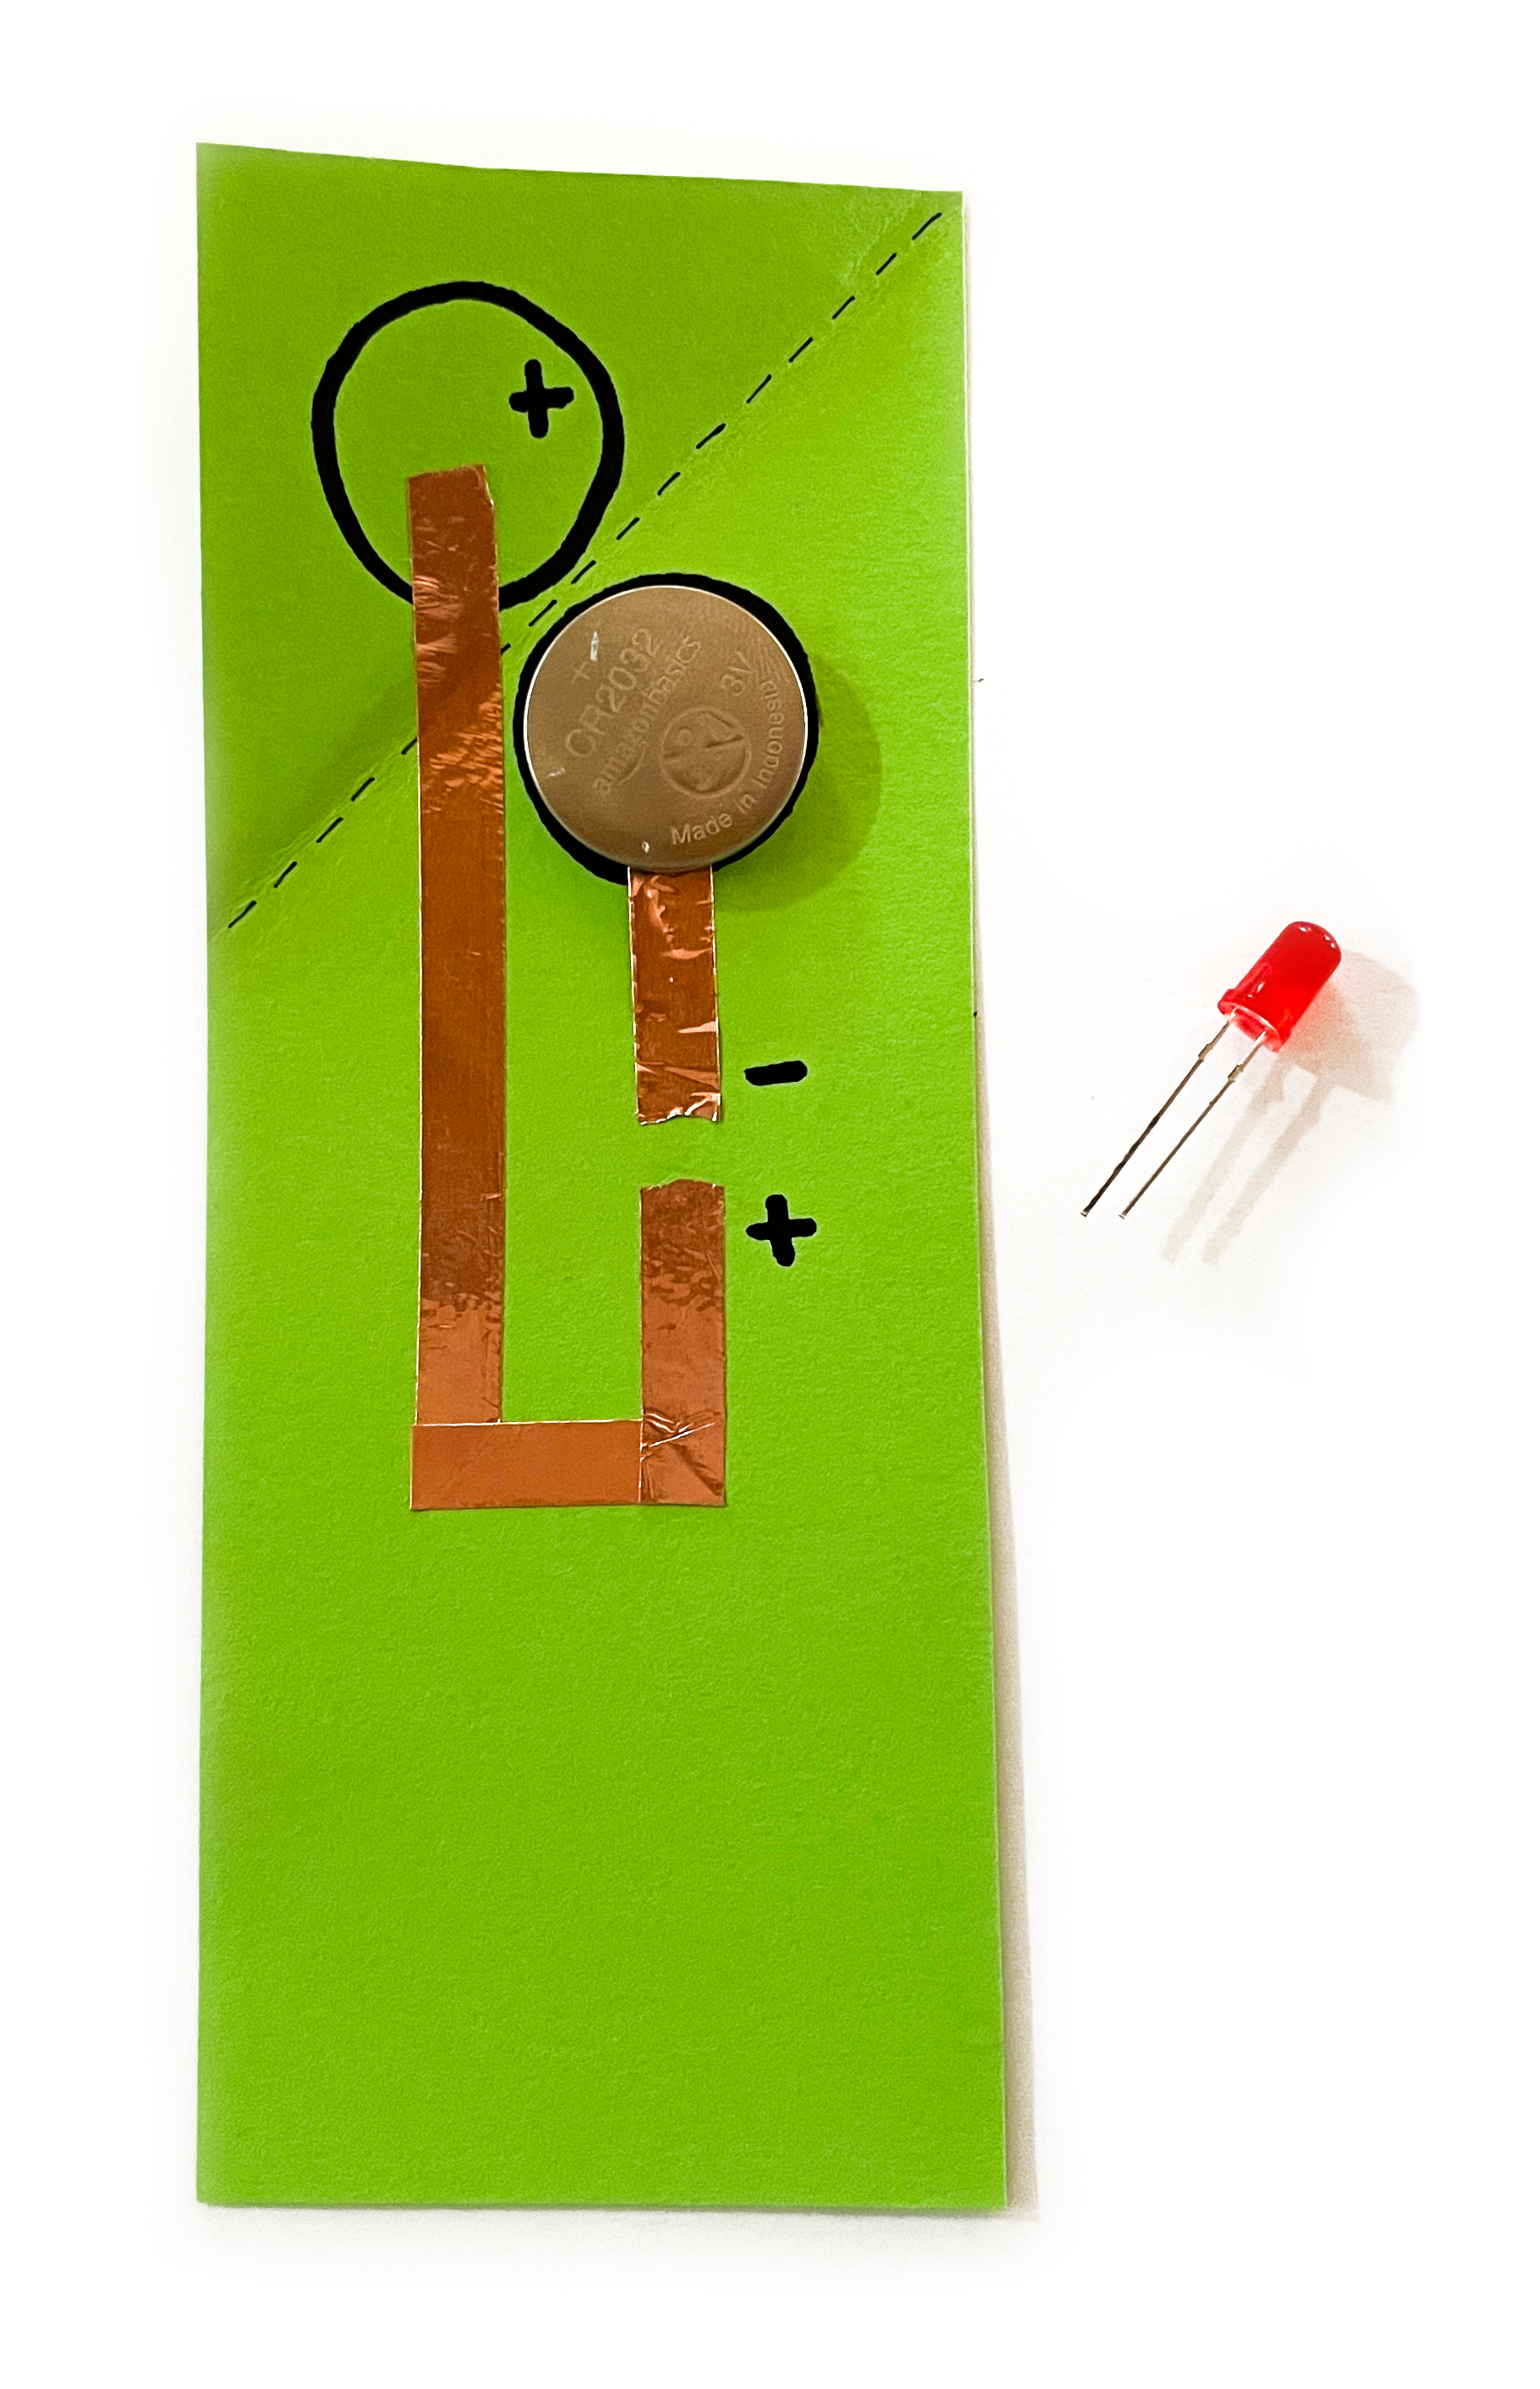
  1. Place the coin cell battery face up so that it's on top of the (-) circle.
  2. place battery on top of the circle marked as negative
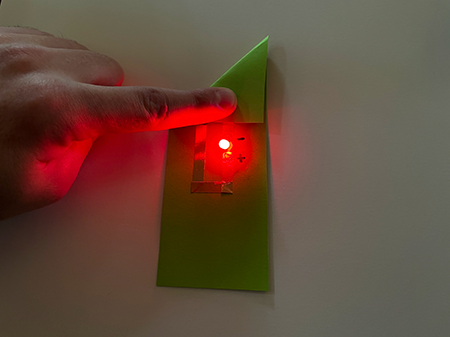
  3. Place your LED onto the copper strips in the correct (+)/(-) orientation and secure it using copper tape or clear tape. When the corner of the paper is pressed on top of the battery, the light should illuminate.
  4. LED turns on when the paper corner is pressed on top of the battery
Make another circuit that uses more than one LED.
In this activity, you learned how to complete a circuit on paper using copper tape, a coin cell battery, and an LED.